
Step by Step installation of Python 3 and Pycharm IDE on Windows OS
Python is a popular, high-level programming language with a broad range of applications.
Python programming language (latest Python 3) is utilized in web development and machine learning applications, as well as all cutting-edge technology in the software industry. Almost all tech giants employ this programming language.
It is very easy to follow and understand this programming language. In this blog series, we will learn the basics of Python Language. Before learning about basics, let’s learn on how to install Python and Pycharm IDE on Windows OS
For best experience, if you are viewing this tutorial on Mobile, please rotate your mobile horizontally to view the tutorial. You can enable auto-rotate in the phone settings.
Below are step by step process on how to download and install Python on Windows:
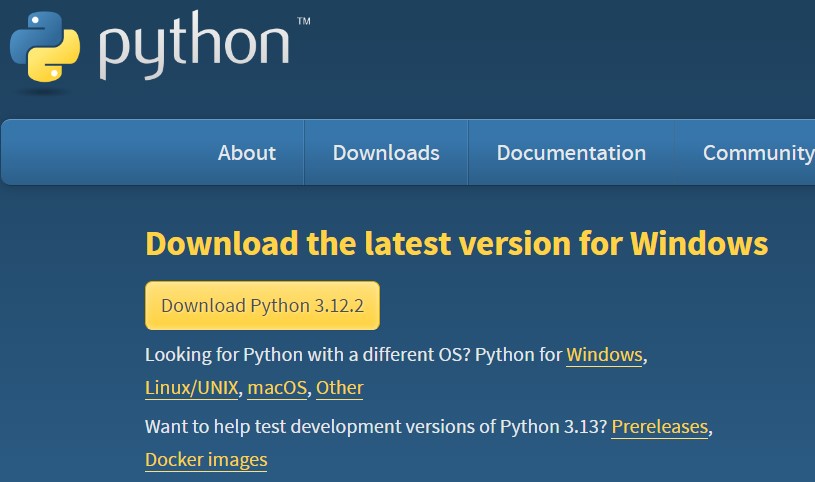
Step 1)
To download and install Python, visit the official website of Python https://www.python.org/downloads/ and choose your version. We have chosen the latest version 3.12.2. If you would like to download earlier versions, you can do so by going to Downloads section and choose the desired version.
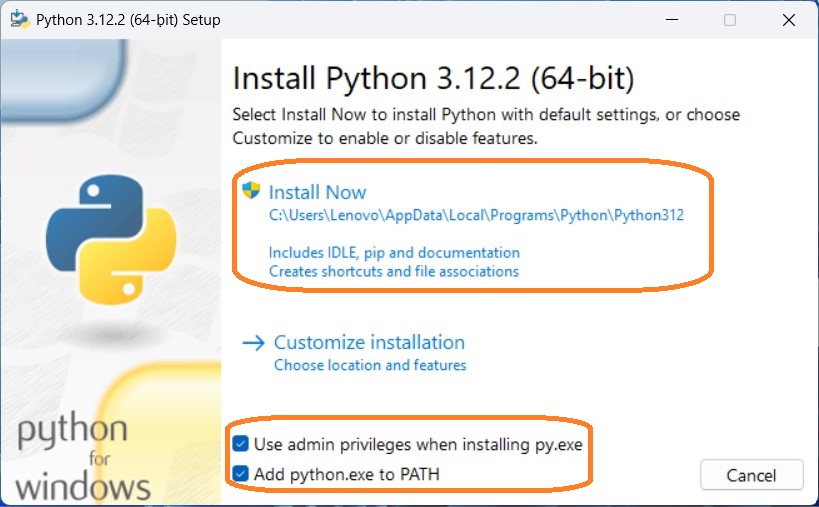
Step 2)
Once the download is completed, run the .exe file to install Python. Now click on Install Now. Please make sure you select the checkboxes at the bottom.
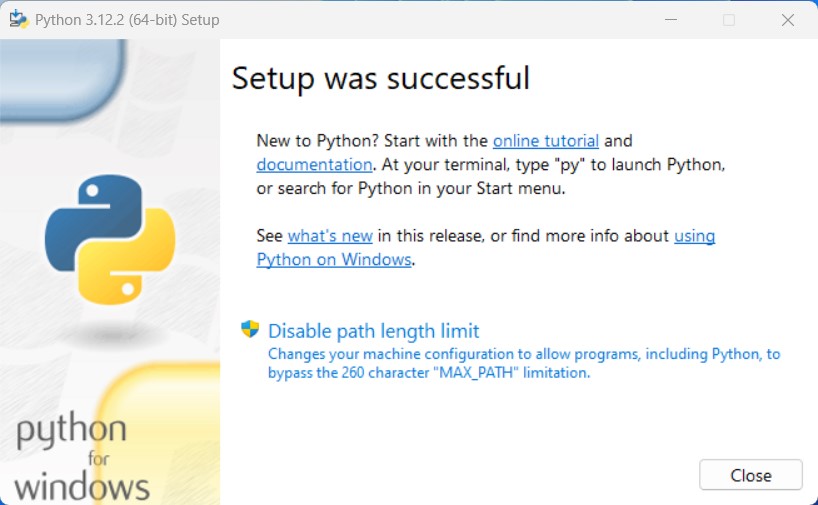
Step 3)
Please wait till the setup is complete. When it finishes, you can see a screen that says the Setup was successful. Now click on “Close”.
How to Install Pycharm
Here is a step by step process on how to download and install Pycharm IDE on Windows OS:
Step 1)
To download PyCharm visit the website https://www.jetbrains.com/pycharm/download/. On this page, you will find Professional Version and Community Edition Version. Please scroll down and download the Community Edition version as it is free and built on open source.

Step 2)
Once the download is complete, run the exe for installation. The setup wizard should have started.
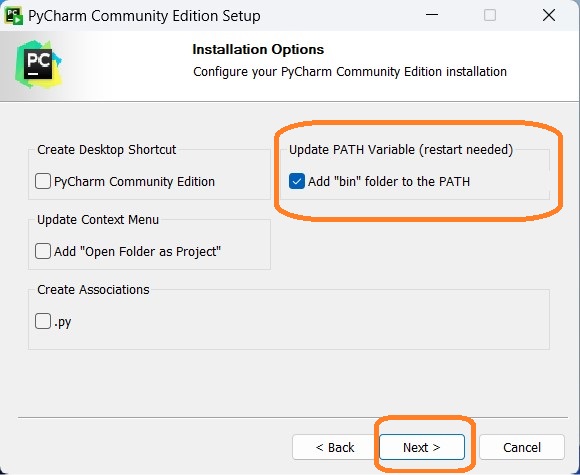
Select the checkbox for Add “bin” folder to the PATH. Leave the remaining checkboxes as it is.
Click on “Next”.
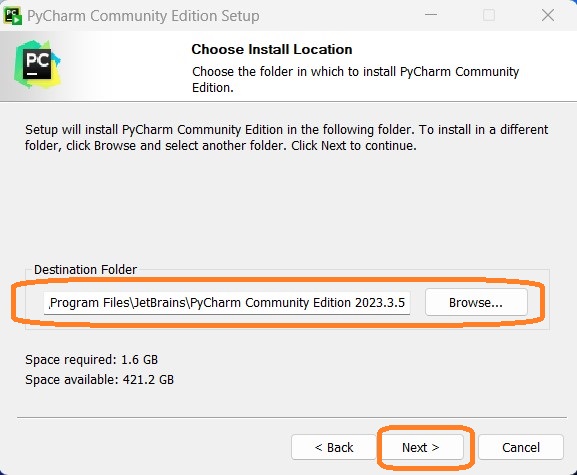
Step 3)
On the next screen, Change the installation path if required. Click on “Next”.
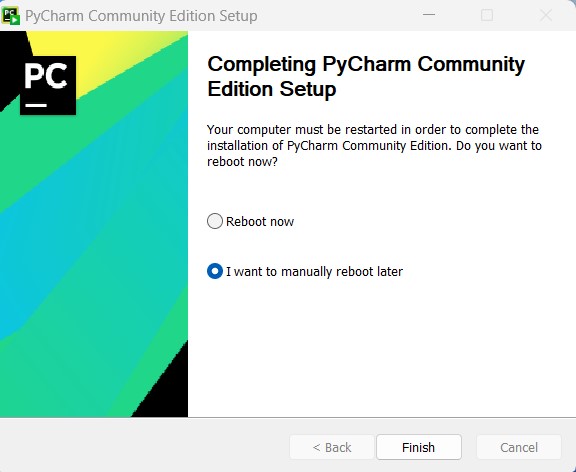
Step 4)
On the next screen, you will see two options “Reboot now” and “I want to manually reboot later”. Select the option “I want to manually reboot later” and click on “Finish”. Reboot is not required at this moment.
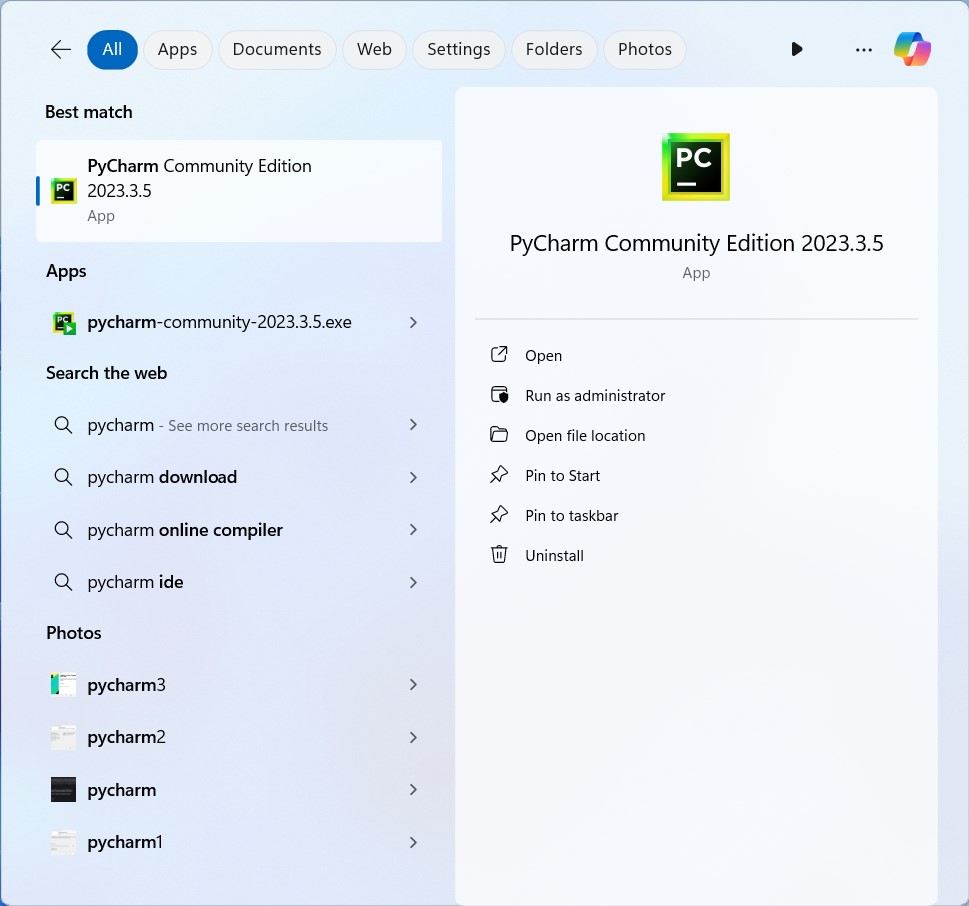
Step 5)
Now, search for the installed Pycharm application on your Windows OS by typing Pycharm in the search box. Click on “Open”.
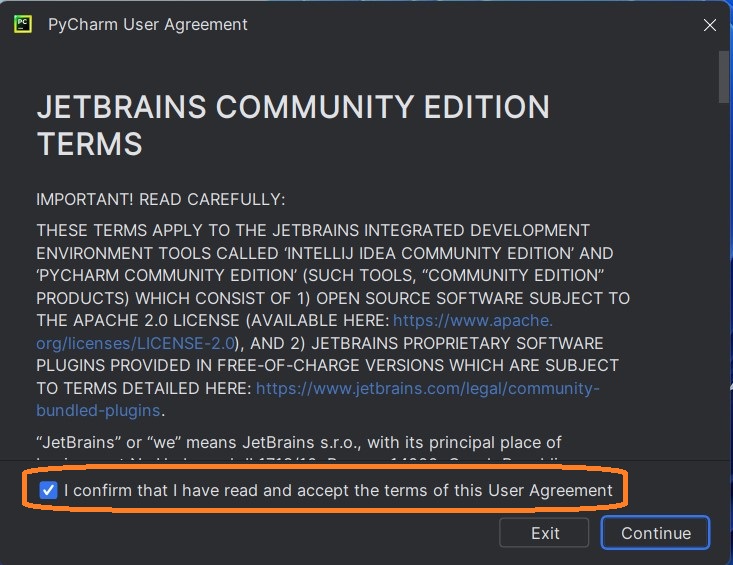
Step 6)
On the next screen, Pycharm User Agreement is shown. Read the agreement as per your convenience and accept the terms by selecting the checkbox. Click on “Continue”
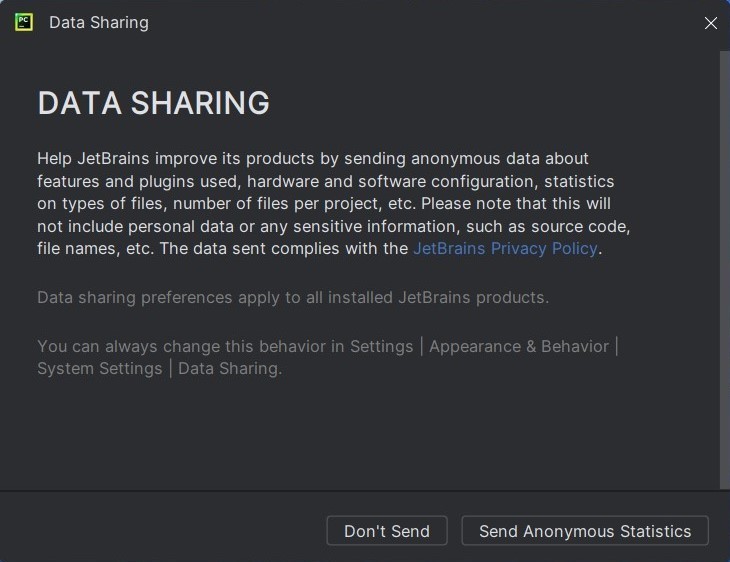
Step 7)
On the next screen, Data Sharing details will be shown. You can choose to send the data or deny it. I chose “Don’t Send” at the moment. You can always change the setting as per your convenience.
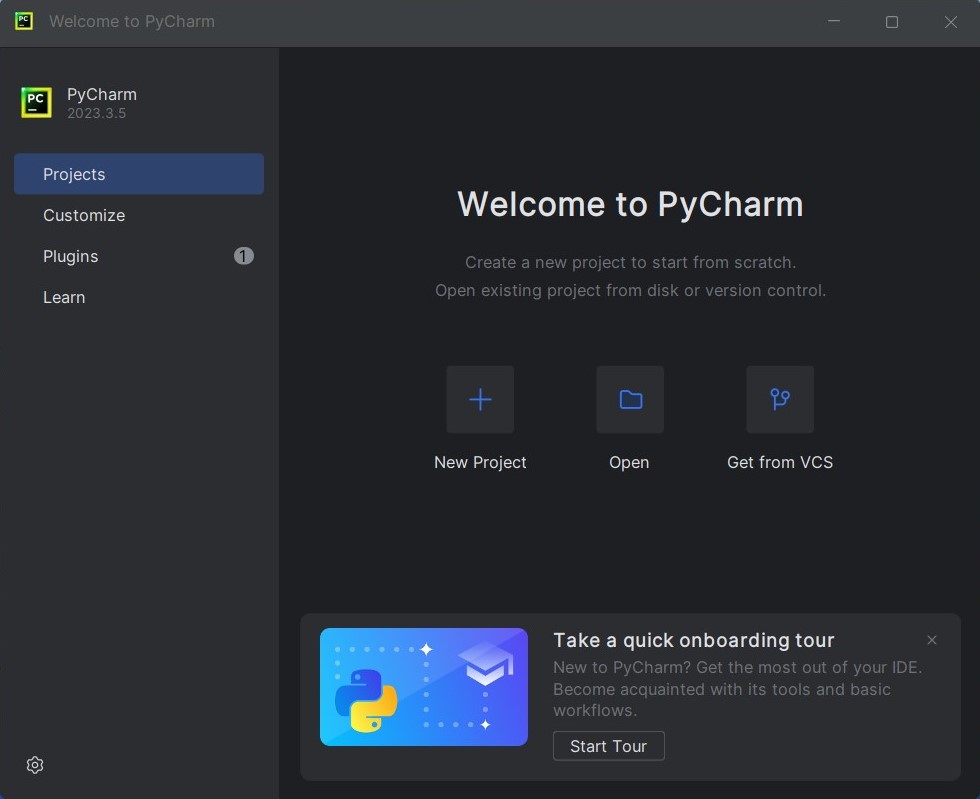
Step 8)
Finally, Pycharm Application screen will appear
Installation of Python and Pycharm IDE is completed. In the next tutorial, we will see how to configure and use Pycharm IDE to learn this programming language.
If you have any questions or comments, please let us know in the comment section below