
Step by step configuration of Pycharm IDE and running your first Python program
In the last tutorial, we completed Python 3 and Pycharm IDE installation and setup. It’s time to configure Pycharm IDE and Run your first Python program.
If you haven’t gone through the last tutorial, here is the link for the same:
https://weblogstories.com/how-to-install-python-and-pycharm-ide-on-windows/
For your reference, to download Pycharm IDE, visit below link:
https://www.jetbrains.com/pycharm/download/?section=windows
Configuring Pycharm IDE
Step 1)
Open PyCharm Editor by searching for the application in the search box on Windows OS. You can see the introductory screen for PyCharm. To create a new project, click on “New Project”.

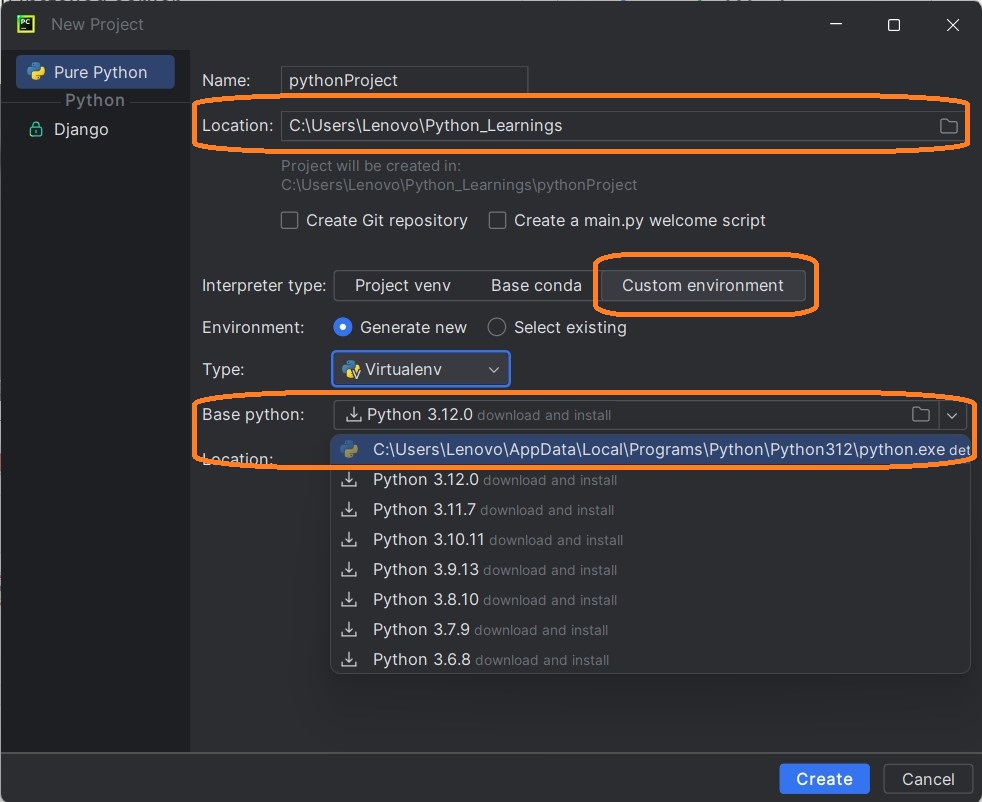
Step 2) You will need to select a location.
- You can select the location where you want the project to be created. If you don’t want to change location than keep it as it is. For better navigation and understanding, I created “Python_Learnings” folder.
- Select the Interpreter type as “Custom environment”.
- For Base Python, click on the arrow at the far right side and you will see a drop down as shown in the image below. Here, you can find the Python interpreter (C:\Users\….) you installed earlier. Select the interpreter you installed as Base Python.
Step 3)
Once you select Python interpreter (C:\Users\….) as Base Python, you will see the configuration as shown in below image. Now, Click the “Create” Button.

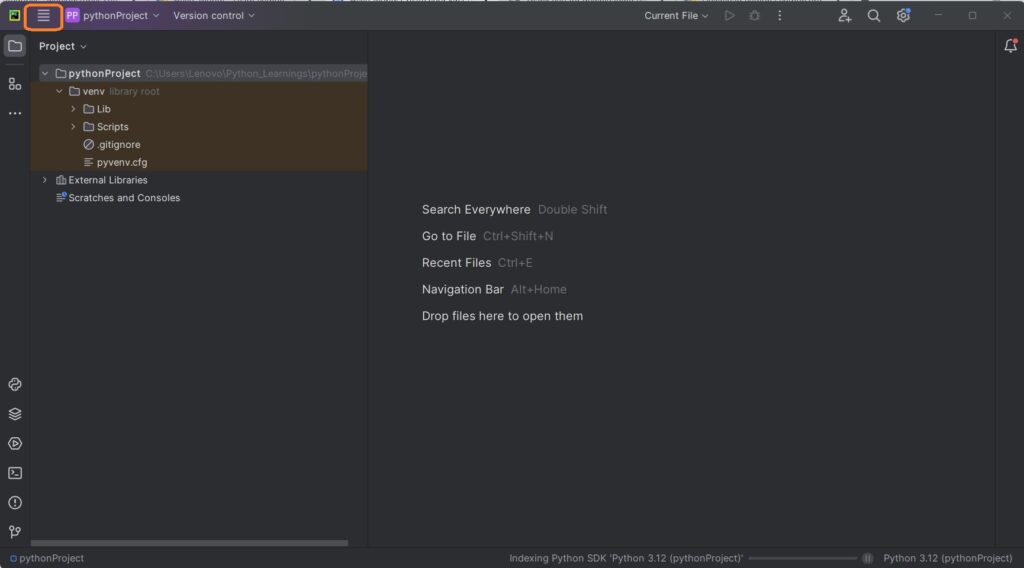
Step 4)
This completes configuration of Pycharm IDE. Now, we can run your first Python program. Click on the “Main Menu” settings (top left hand side as shown in the image below)
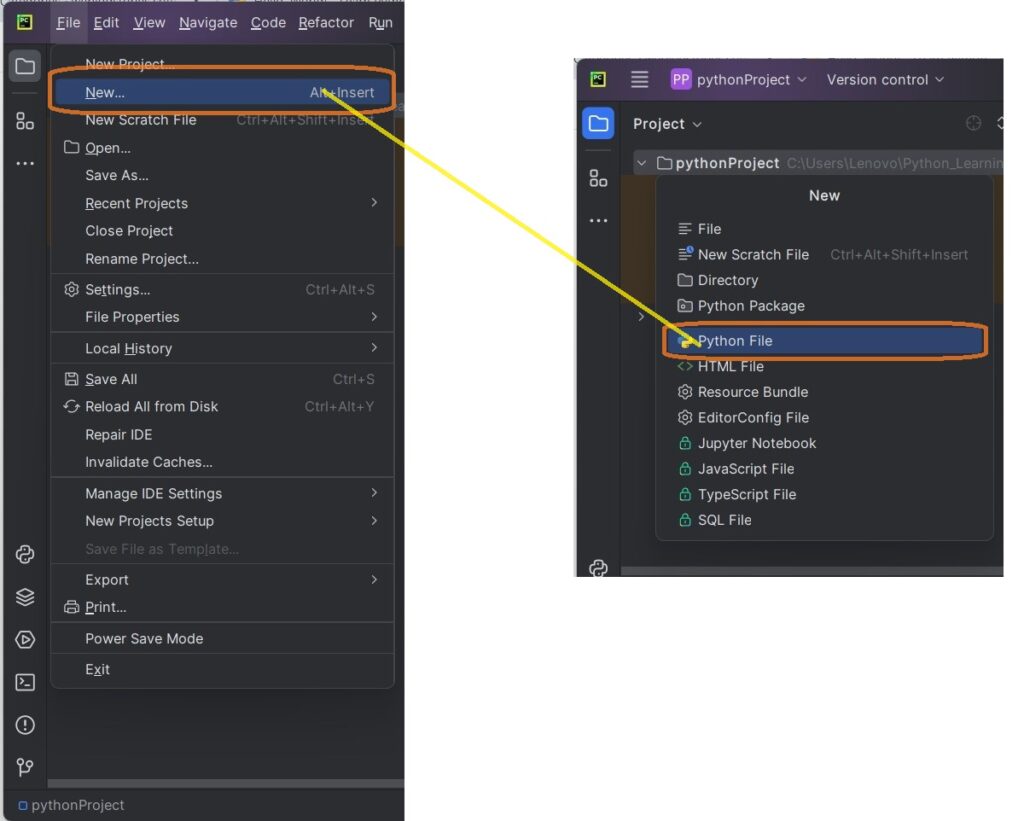
Step 5)
Now Go to the “File” menu and select “New”. Next, select “Python File”.
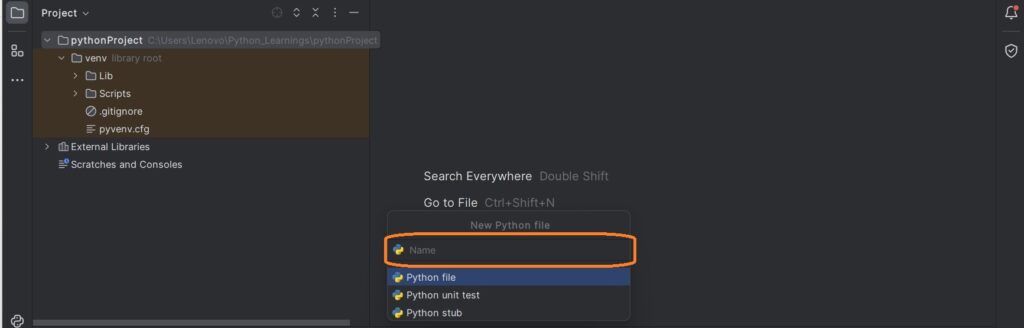
Step 6)
A new pop up will appear. Now type the name of the file you want (For example “HelloWorld”) and hit “Enter”.
Step 7)
Now let’s try a simple program. Type – print (‘Hello World!’).

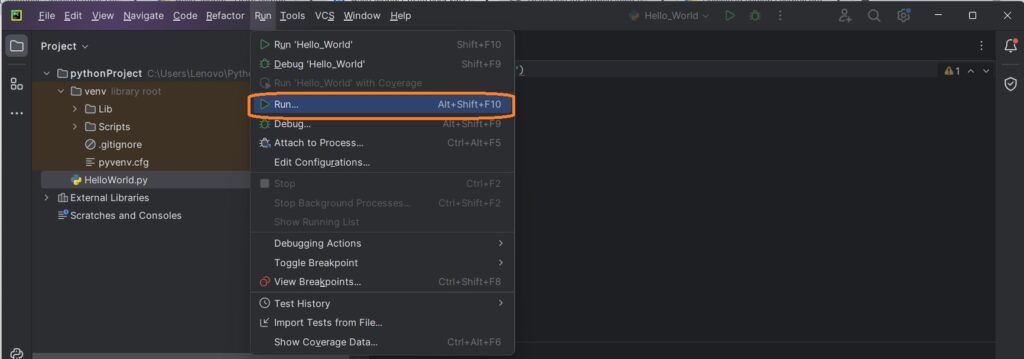
Step 8)
Now Go to the Main Menu settings and navigate to the “Run” menu and select “Run” to run your first Python program!
Step 9)
You can see the output of your Python program at the bottom of the screen.
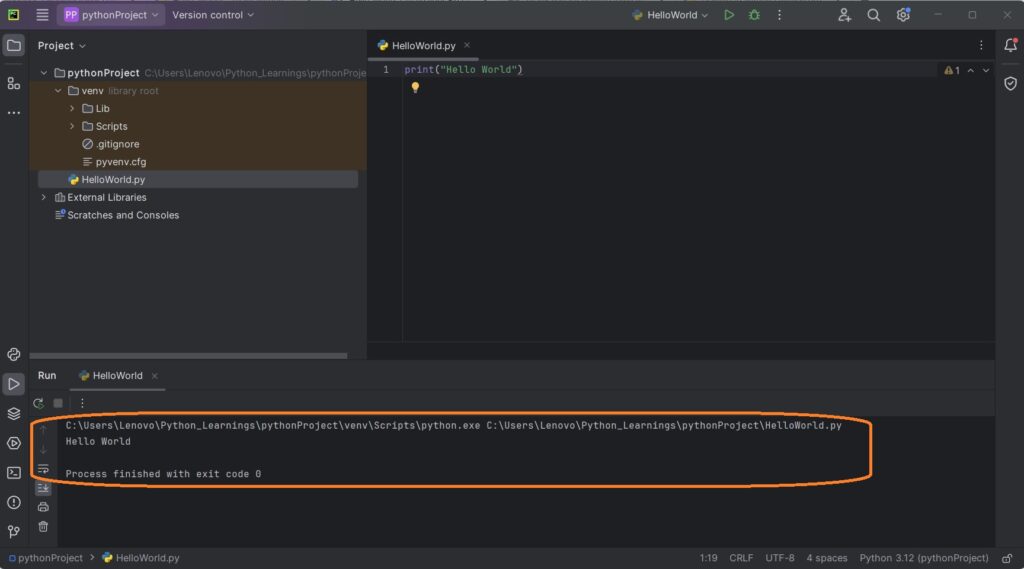
Finally, you have successfully executed Python program on Pycharm IDE. Congratulations!!!
P.S:
You can execute your Python program from Windows command prompt as well.
Open Command Prompt by searching for “cmd” in the search box. Once, command prompt window is displayed, enter the correct path of the Python file you created above. Please see the images below:

After navigating to the file path, enter the file name. In this case, it is “HelloWorld.py”. Press “Enter”

As you can see, program got executed successfully and the output is as below:

If you have any questions or comments, please let us know in the comments section below.